Showing posts with label Lighting. Show all posts

Sunday, 15 September 2013

Chocolate lamp photos


Making it.

I felt the best and easiest way to make this light was to lathe it, I first started by lathing the top dome that would be later vacuum formed that would be were the chocolate would be incased. I then lathed the body of the light, I went to a simple shape that widened halfway up and then angled back in, I felt that this was a different shape then most lights as center pieces. I also made suer the bottom of it it perfectly fitted the vacuum formed plastic.
After I made all of the forms I wanted to design the the holes where the chocolate would fall through I didn't just want a simple one hole in the center as I feel thats what a bottle it for, I wanted it to be unique and delicate so i did a few sketches;
I looked at doing circles, rings and lines as I felt that they could all give of a different look when the chocolate flowed through them. I didn't think I should do the ring one as I thought it would be to hard to execute cleanly as I would have to cut the shapes out with a craft knife and doing curved spaces are hard to pull of well so I decided to to continue with that design. I first tried the lines and cut them in to one of my vacuum formed plastic domes and tried to pour melted chocolate though them and see what happens.


I found the four lines didnt would as well as I had hoped I found three problems with it

  1. I found i had made the slits to narrow so that when the chocolate was poured into it it did not exit and just sat in the bowl
  2. The chocolate fall all along the lines I found the the chocolate just fell to the end of the points and then drop off which defeated the point of having them as lines
  3. the last problem I had with the four lines was that I felt it looked like an udder as there was four part the chocolate could exit and I didn't poetically want it ti look like an udder it wasn't the look I was going four.
after the lines I tried the circles and I make them wider then the lines and I found that the chocolate flowed a lot easier with a bigger area.

After this I had an idea to give the user a bit of freedom and alterations so I made two more chocolate cases, one with three larger holes and the other with just one even bigger hole. having three different covers meant the user could choose what one they wanted, they could have one with six smaller holes that would take longer for the chocolate to fall though but would spread the chocolate  out further when it falls while the one big hole would melt faster but would only fall in one spot. 

I also had to think about the shape of the chocolate inside the case, I found it didn't melt all the way though when it was to thick this then meant the chocolate didn't fall though. I also didn't want it to thin then there would be enough chocolate to enjoy. the way I found to get it just right was to have it thiner where the chocolate would exit so it would melt faster and then have it thicker on the sides so due to gravity then it melted it would get heavy and fall through. 

Chocolate

when talking it over with my tutor we decided that my wax light wasn't strong enough as there wasn't much to it so after a long time of thinking we came up the the brilliant idea of making the light no longer out of wax but out of chocolate instead, to make it a center piece for a dinner table so the when the light is on it results in the chocolate to melt.

I thought of different ways I could deign it

  • the first was to make the chocolate around the light, on top of it so when the heat would rise from the light it would make the chocolate melt and collapse around the lamp, reveling the light and making a fondu around it. the problem I had with the form would be that I didn't think it would be the best move to have the chocolate fall onto the light as there could be some health risk with halogen lights mixing with food i also didn't want chocolate to get into the wiring as it seemed like a mess to clean up.
  • another Idea I had was to have the chocolate like a candle and have the light on the flexible wire and have it going up the center of the light resulting in the chocolate to represent a candle and when the chcoclate melts it would make a melted puddle around the base of the candle.
  • another Idea I had was the have a ring of halogen light that the chocolate would melt through, this way the light wouldn't be covered and would be shining the whole time and won't be effected by the chocolate but would still make the chocolate melt through the center.
  • the last Idea I had was to have the chocolate and lighting fixture hanging up above the users dinner table with the chocolate below the light incasing the light, and below on the table would be a bowl of the food that the user wants to have covered in chocolate, such as fruit nuts or crackers. when the light heats up the chocolate it will make it drip down and slowly revel the light with in it.

Development.


After doing the testing I thought about different ways I could make the form work, I tried to push the Idea of having the wax fall into water but I found it hard to pick a shape as I needed the wax form to be an angular shape pointing down so the wax would fall down when it melted but i couldn't figure out a shape of the water to complement it. I also found it hard to figure out how to hide the wiring from the battery to the lights as the wax would be sitting on it and I don't want it to be visible. I finally came up with an idea when I found a lighting design online that I liked I thought it was simple but I liked the contrast between the to materials, so I was going to redesign this look but make it out of wax rather then a bulb so that when it melted it would show the contrast between the wood and wax thou not just the colour and the transparency of the wax but also would show how the wax melts in the light and the wood wont, it would also make a interesting shape around the wood as it melts down, it will go form two balls to one.


Saturday, 14 September 2013

Halogen

I felt the next step to do was to buy some halogen lights and play around with them and find out their limitations, I went to a Lighting shop and asked them about halogen lights and want was the easiest to work with so they found me some 10watt bulbs, having 10 watts went that I could set them up to s simple circuit and use normal batteries rater then buying but battery packs.
i was also given sockets to put the bulbs into so that so it didn't have to play around trying to solder the lights to wire and it also had hooks on it so I could easily attach it to my frame. I also found away to get around soldering because in the last project I found it very difficult to solder so this time to save time and my sanity I would a way to screw the wires in to place rather then solder them.
 I found a place in wellington to buy big blocks of wax that I could melt down and remold in to my chosen shape.
I then made a simple circuit to see it I could get the light to work, and I DID. 

The next part was the most important part of my testing, to see if the light could get hot enough to melt the wax, so I set it up so the wax was siting on top of the light so that when the heat off the light would rise up and corse the wax to heat up and melt. and it worked... very slowly, but it worked. i feel a few there where a few factors on why it melted slowly one would have been the fact that it was only a 10watt light and if i had a stronger one it would melt faster and another factor would of been because it was in an open space so the heat was not controlled so it went out the sides so it i made it a closed space it would trap the heat resulting it to melt faster.


wax concepts


I came up with a few concepts on making my own wax light;

  • I first came up with have a very geometric wax shape so that when it melted it would change shape to soft rounded organic shapes showing the contrast between the start point and end point, I felt that is form would inherence the forms and shapes wax can take on with it starting out with hard sharp shapes. I was think a few hanging triangles showing repetition and also representing a modern look on stalactites.
  • another idea I had was to have multiple lights that had different switches so it was up to the user to switch them on and off, so they could control what lights would corse the wax to melt or at what pace the wax would meant out, the more lights on, the more heat, resulting in the faster the wax to melt. it light is more interactive and got the user to think about how they wanted the wax to form.
  • Another shaper I thought of was to have a round shape to represent a flame, i felt that this was a strong way to show the concept of the heat of the light because when I think of wax melting I think of fire melting it, not light so having the wax the shape of wax plays on that idea and when the light is on the wax would melt and change the shape of the wax and slowly reveling the light being the source of the heat and light.
  • I also though about how the wax would fall and I didn't just want the wax to fall on the ground but didn't just want a container to capture it in as I felt it would reflect to much on the precedent so I thought about making a clear container that held water in it so when the wax fell of the top part it would fall in to water, and at first the wax would make little balls of wax that floated on the top of the water and then over time as the wax accumulated it would cover the water so you would no longer see it and would act like an iceberg in the ocean and be a stable structure onto of water. It would also be easy to clean up as the wax would of only stuck to its self so to remove it all you would have to do it just scoop it out of the water.
  • I also had to think of different ways to hold the wax to the light, in the precedent the used bent wire to hold it on and it also would restrict the wax to much when it is melting so i wanted to find away that would do that to. I thought of doing pins that went though the wax and into the frame on angle. I also thought about having a screw in system so the wax would screw into the frame but I thought that the would be hard to make fit perfectly. I also though of having the wax on top if lighting and having holes around the lights so the wax would drip though because heat risers so having above would not only be easier to support as heat risers it would melt faster. 

Wax light

I came a cross the light one night as was really inspire by it, on how such as simple concept had a looked so unique and could stand out so strongly. So i felt i would change my idea for my light to use this as a precedent,


I really liked the fluid organic forms and movement the wax makes when the the light it on. I enjoy how a harsh shape of the way the wax starts with moves into soft unpredictable shapes as it melts down. I love the warm coloured light that comes though the wax and the different shadows and brightness it creates in the different thicknesses of the wax and when the wax melts away the light becomes stronger. 
another part of the light that fascinated me was the way the wax was reused, it was designed so the wax would drop in to a cup below the lighting fixture and would remold the shape of the wax so it can be re used. the problem with this is I don't think it would work properly as air would become trapped in the bottom case and it wouldn't dry flat on the top so it would never look the same as the original, but I guess that the fun and uniqueness of it.
I would use the concept of wax and light as I feel that those are two strong complainants together and its quite a unique way to show different aspects of light and lights don't just produce light but some lights such as halogen lights also produce heat. I would play around with what way the wax falls (falling off the frame or having it above the frame and have it fall around it) or i could get it to fall on to something like fall into water or fall onto an uneven surface to adjust the way the wax would form.

water light

I looked into creating a light that used water to produce the current like the "water graffiti wall", I tried to think of other ways to make water interactive and unique in a simple way to create the circuit as that is not my strongest part of design, so the simpler the better.

I first idea I had was to form a kind of funnel so that you would pour water down the center and it would core the lights to turn on and I would design a pattern, I thought about the patters first I came up with the ides where when the water flowed though the lights would turn on in a spiral starting from the top and working its way down, the next I thought rings which different lights would turn on in an unexpected pattern making the whole experience unexpected. and the last was just vertical strips that when the water hit the bottom of the funnel the lights would flash.
another idea I had was to have multiple small funnels that would capture the water in different parts so when then different funnels get water different lights would turn on. this design seemed more interactive and unique I also thought it would be easier to execute. 

Sunday, 18 August 2013

CLOUD: An Interactive Sculpture Made from 6,000 Light Bulbs

Another light design I looked at was one called the Cloud designed by Caitlind r.c. Brown & Wayne Garrett which is an interactive sculpture which is made up of 6,000 light bulbs which have been placed to form the shape of a cloud and is designed for the user to turn the lights on and off individually by pulling hanging cords.  it was designed to 're-imagining their potential to create wonder and inspire collaboration.  As part of the process of creating the sculpture, the artists collected burnt out incandescent light bulbs from the surrounding community, forging an informal relationship with non-artists, reducing costs, and asking audiences to reconsider household items in an alternative context. During exhibition, viewers interact with CLOUD by initiating impromptu collaborations, working as a collective to turn the entire sculpture on and off." The video of this sculpture is https://vimeo.com/49748983


I like how interactive this lighting device is and how they use reused simple everyday light bulbs to creates something unique and creative, I like the sound the cords make as the rattle backwards and forth it creates a lovely fluid look that I feel resembles rain falling. like watching the joy that the users had as they pulled the different strings wondering what lights would turn on and off.


Water Light graffiti

When I was looking up ideas for my next project I came across this project that Antonin Fourneau had designed. It is a wall made up of LED thats lights up when touched by water, I found it was a very unique and interesting way to produce light it allows the user to create their own pattern in the light, he took something simple and elegant and things that we interact with day to day and creating an interactive design object. The Vimeo Link is https://vimeo.com/47095462


I like the way that it was made to be interactive and unique, everyone would see it differently and would use it differently, its such a simple and elegant object that stands out from other lighting devices. I would like to try incorporate the way that water is used at a switch and conductor in this model I think it is simple and unique as you then don't need big on/off switches or wires connecting everything up.

Sunday, 11 August 2013

photos


Making it

I first cut the top part of the light out of MDF wood but I didn't like the look of it, I thought it looked cheep and did not work well with the European beech so I disdained to laser cut it again and this time use pine as it had a proper grain so was more ascetically pealing, I liked the colour that the burns made when it cut the wood, I felt it would give a good contrast to colour of the beech so I brought a dark stain to colour the pine.

I finalised on designing the lamp to be a hanging lamp as it would look more complete hanging up and then the reifications of the light can hit a wider surface.

I had trouble choosing what to put inside the top to refract the light i tried a few different things, I first tried clear plastic and it worked ok you could see the out line of the shapes cut in the plastic but it did not refract the light, so then I tried glass got thin rounded glass hoping that since the glass was rounded it would course the light to bend off at different angles but yet again all you could see was the shapes of the glass, I think that one of the reasons I was having this problem was because I had frosted the plastic cover to much so light could be refracted out but I didn't want the glass/plastic to be seen
glass

Plastic


  • In the end I had to go with coloured plastic as it showed the changing of light but it wasn't my be decision as i felt it looked cheep and not to visually pleasing but it showed my concept the best.

I found when wiring this up that wiring is not my strong point in design and found it extremely difficult to do, getting solder everywhere, burning my fingers and spending hours trying to get a simple series circuit to work. I felt to show that it was meant to be hung up I should put a plug to it, it is purely decoration and is not set up to any part of the circuit.

modifying the deign

I changed the design of the lighting device taking out the neck and stand and just focusing on the just the head. I felt that it was going to be to hard to pull of the lamp well with the neck and stand as they had a high chance of not looking ascetically pleasing and looking out of place. I also felt it lost focus from the head, it would be hard for the user to figure out how to use it properly if there was to many parts to it. I then looked at different way to have the whole light all inclosed with in the one lathed wood;

 I want a design that is simple, easy to hold, can hold the weight of the lighting fixtures and looks ascetically pleasing. some my designs I wanted to resumable an old fashioned kaleidoscope and other designs I wanted it to look modern and organic.


This is the design I finalised on I felt it was simple and organic with its soft rounded edges it was would be quite easy to grasp if needed to. on the top you can rotate it so that you can move around the glass inside. the LED strip lighting will rap round the inside of the top of the lamp and the battery will be in the thiner part and the switch will be at the bottom.

I felt to make the top part the rotates and also the bottom part to cover the hole and to make the switch the easiest way to make them will be to laser cut the pieces so the will be all the exact size and can guarantee that the top will spin.
The illustrator file of my laser cutting
some of my laser cut pieces after they were sanded 
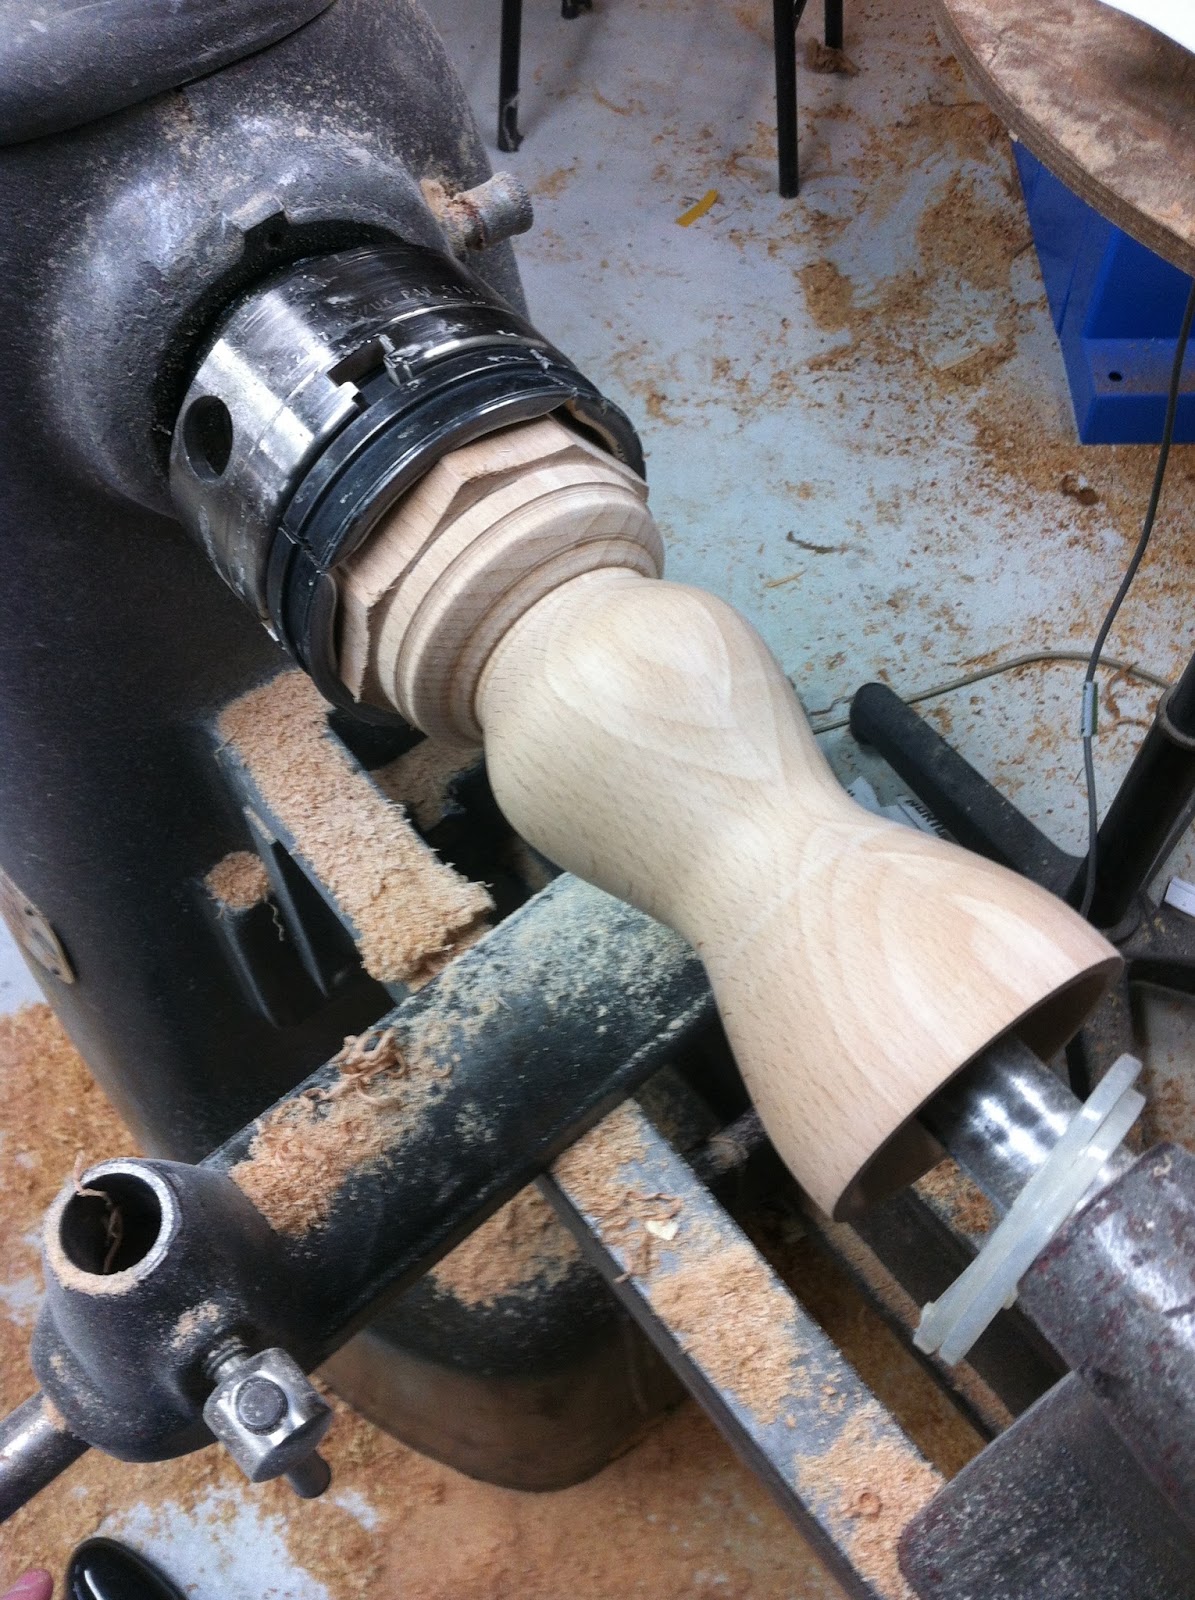
I then made the out side of the lamp on the lathe focusing on the shape I had decided, I found it hard to round the edges and found my self cutting in at a strait angle not rounded but after a bit of practice I got the hang of it and managed to make it in the end and was quite proud of the out come of it as I was smooth and really easy to hold.

finished before cutting it off.

All polished up.


Thursday, 8 August 2013

Lighting

I looked at different types of lighting I could use to produce light in my lamp and I finalised on strip LED lighting as I felt it is easy to use and the light is distributed evenly, I could rap it around the inside of my lampshade and the light would be strong enough to come out of the top and be obvious that it gets distorted by the glass. It also dose not need much wiring to make it run all it needs is a 12V battery connected to it.

Inside lathe

I started making my lamp but lathing the inside of the lampshade with a 20mm diameter hole going all of the way through the lamp and it widening to 80mm diameter at the entrance I felt that that gave enough space for the light to be emitted through and also enough wood left to make sure the wood is strong enough and wont brake. It is made out of European Beech.