- my first part is to enlarge the action of tying your shoes to emphasize what is being done, I still want to keep it in the feet region as I fell that a main part of the act of putting on your shoes is the bending down so there is that connection will using your whole body. really wanted this part of my experience to show a large amount of comfort, as I feel i there is more of a physical connection rather then a mental connection to tying up your shoes (and mostly touch) I wanted to have a stronger connection with the prevention of physical discomfort in this part of the experience. in making this I will use soft materials, two soft paddings sewn tougher that can be laced up, this would cover the whole leg making the experience more enlarged, to make this I will make it from two pillows and three pillowcase all sewn together, two of the cases will hold the pillows and the other will act as the tongue will large satin ribbon to tie it up. all of these soft materials will prevent an uncomfortable experience physically and also manipulate the actions on tying up your shoes. I will also line the bottom of the incasing with a soft fur fabric the will create an initial physical comfort and it also create a warm environment inside the helps to make it more comfortable
- when tying up your shoes you normally sit down, so I feel that the sitting down part of the experience is quite important, to prevent discomfort i will have the chair ergonomically comfortable with the average sitting hight for the average sized person, to prevent pain and ache. I will also add padding to the chair to had even more support. the touch, warmth and ergonomics are all used to prevent physical discomfort.
- To create physiological comfort I will look at smell, the visual look of the experience and the way I act when presenting it. in one of the reading I found it explained that smell was a good way to crate comfort as it can trigger past memories and if a comforting memory will stimulate the feeling, I wanted to use this Idea as I personally find that the smell of lavender is a comforting smell, So I will cover the object in lavender oil to crate the memory.
- another physiological comfort factor is the visual look of the object, this plays on the idea on memory and history with other objects. I feel an object looks comfortable with the shapes the form creates, soft, fluid, rounded shapes and also the colours used, my personal preference on comforting colours are warm colours such as yellow, orange and white. as I am trying to keep the model simple and not over powering so I feel I will make the whole model pure white and will use soft fluid fabrics to make it so it looks comfortable before sitting on it and using it.
- when looking at how nurses use comfort, it is in their actions, even though it is over a long period of time for them to create their time of comforting actions to their patients i want to try and use their type of personality of make the experience more mentally comfortable; friendly, gentle, kind and friendly.
- time is also a factor that I feel it a big part of comfort, I want to keep it short and simple as we take comfort for granted I feel that the user would start loosing the comfortable feeling it I keep it going for to long, so it should only last about 2 minutes.
Showing posts with label development. Show all posts
Showing posts with label development. Show all posts
Wednesday, 16 October 2013
The design.
I want to make an experience to represent the actions of putting on and tying your shoes in a comfortable way. I feel that comfort is simple but meaningful, its a feel that you don't want to over power as then i feel it loses its meaning, so I want an experence that dosent have to many gadgets.

comfortabel experience
After doing readings on both psychological and physical comfort and looking at the difference of comfort and discomfort I found that the psychological accept played a more fundamental part of creating comfort then a physical object, as it was easier to determine wether an object was my physically uncomfortable or not uncomfortable rather then determining if it was comfortable due to comfort being a subjective phenomenon (Vink, 2005) and also we take physical comfort for granted as physical comfort is stronger after discomfort (Farrell, 2009).
There are two parts I want to portray in my experience
First I want to create an environment to prevent discomfort physically, such as;


There are two parts I want to portray in my experience
First I want to create an environment to prevent discomfort physically, such as;

- Using soft fabrics and textures such as fur, or satin and having soft padding that works ergonomically. Also colours that are deemed warm like orange, white or yellow
- a warm environment with temperature and and humidity.
- Also prevent pain, ache, numb hurting and other discomfort sensations.
- consider the ergonomics and posture to the experience, will they be standing or sitting, will it have support or not?
second I want the experience to be psychologically comfortable;

- use a smell that will bring comfort in the use of memory and history, I personaly see the smell of lavander as comforting as I relate lavender with going to sleep, when I couldn't sleep when I was a kid my mother used to rub lavender on my chest and wrist to help me relax, so now when I smell it I relaxed which I fell is a sense of being comfortable.
- create a safe, relaxing, calm and restful environment
- when presenting show positive attributes of, kindness, gentleness, goodness and friendliness
- think about the history behind peoples experiences of putting on shoes and use the idea of memory to create a comfortable environment
I feel that it is important to have two parts of the experience, my theory is that you can't create physical comfort only try to prevent physical discomfort as we as humans take the physical aspects of comfort for granted. so preventing physical discomfort will only act as a catalyst to creating physiological comfort, this will then be created by making a comfortable environment using memories, safety, relaxation and positive attributes.
Sunday, 15 September 2013
Making it.
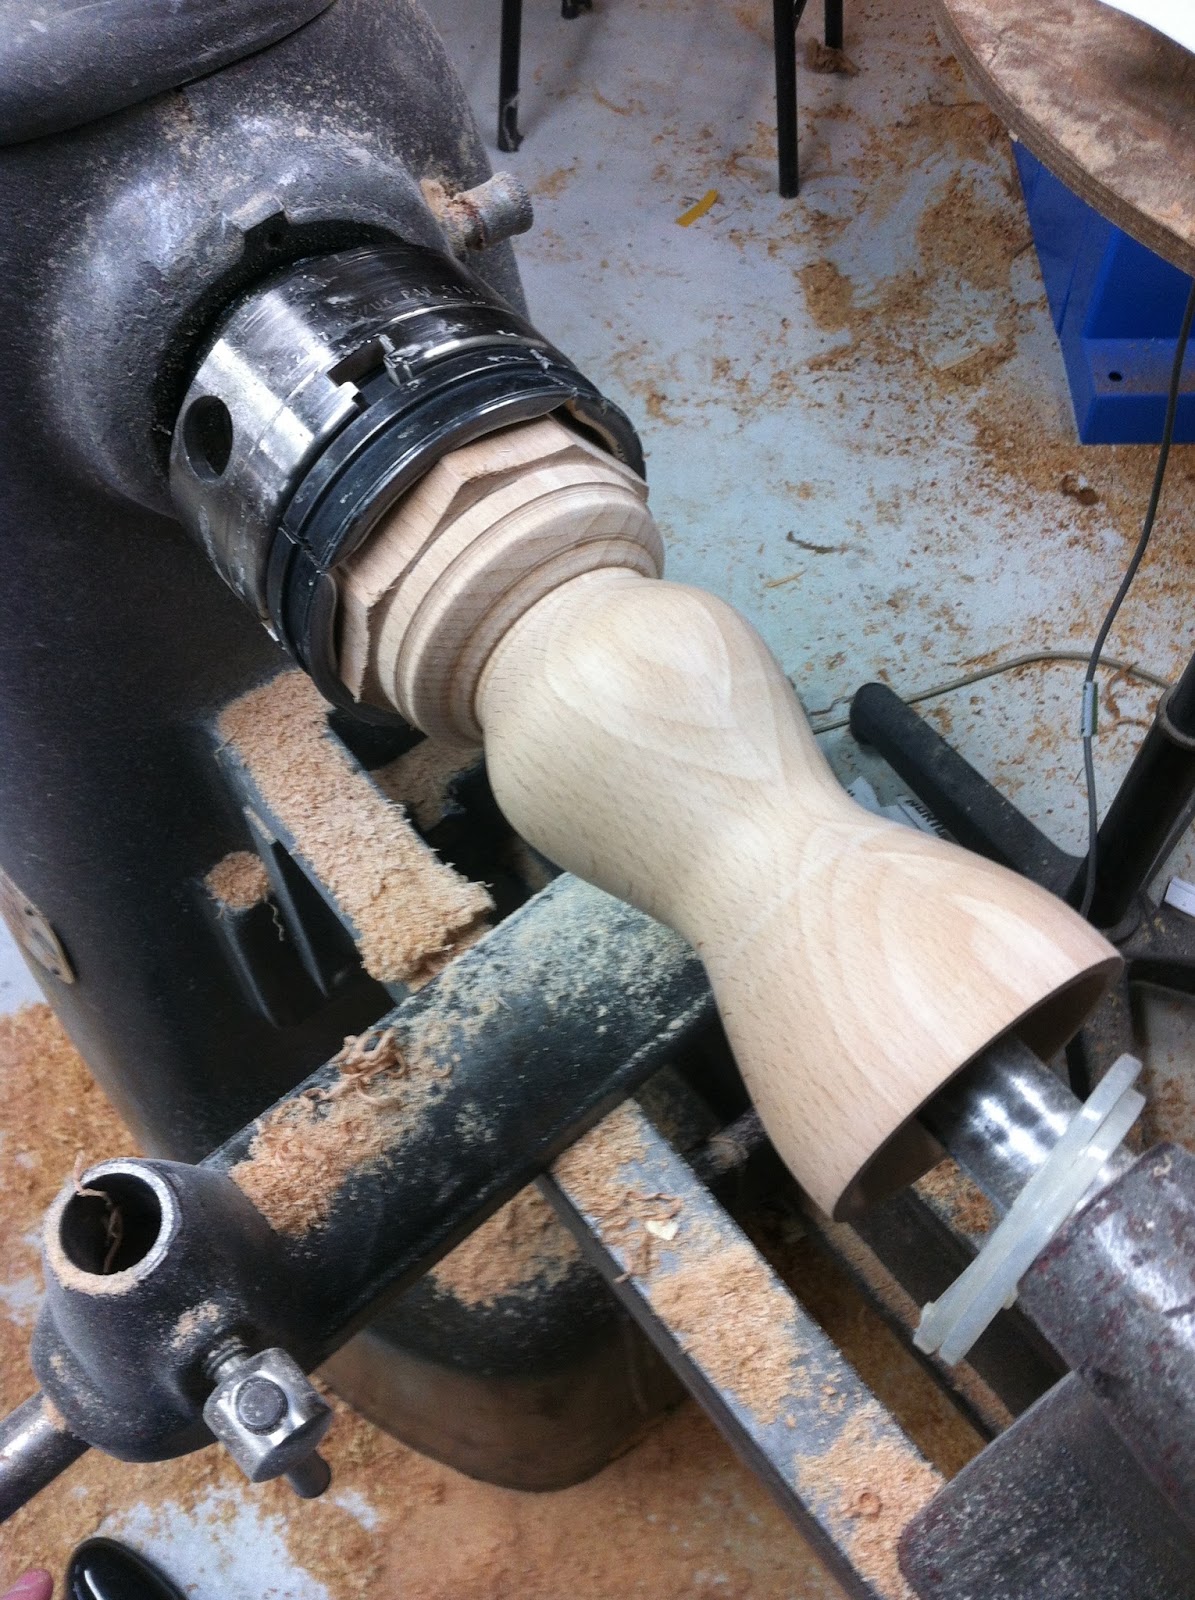
I felt the best and easiest way to make this light was to lathe it, I first started by lathing the top dome that would be later vacuum formed that would be were the chocolate would be incased. I then lathed the body of the light, I went to a simple shape that widened halfway up and then angled back in, I felt that this was a different shape then most lights as center pieces. I also made suer the bottom of it it perfectly fitted the vacuum formed plastic.
 After I made all of the forms I wanted to design the the holes where the chocolate would fall through I didn't just want a simple one hole in the center as I feel thats what a bottle it for, I wanted it to be unique and delicate so i did a few sketches;
 I looked at doing circles, rings and lines as I felt that they could all give of a different look when the chocolate flowed through them. I didn't think I should do the ring one as I thought it would be to hard to execute cleanly as I would have to cut the shapes out with a craft knife and doing curved spaces are hard to pull of well so I decided to to continue with that design. I first tried the lines and cut them in to one of my vacuum formed plastic domes and tried to pour melted chocolate though them and see what happens.

 I found the four lines didnt would as well as I had hoped I found three problems with it


- I found i had made the slits to narrow so that when the chocolate was poured into it it did not exit and just sat in the bowl
- The chocolate fall all along the lines I found the the chocolate just fell to the end of the points and then drop off which defeated the point of having them as lines
- the last problem I had with the four lines was that I felt it looked like an udder as there was four part the chocolate could exit and I didn't poetically want it ti look like an udder it wasn't the look I was going four.
after the lines I tried the circles and I make them wider then the lines and I found that the chocolate flowed a lot easier with a bigger area.


After this I had an idea to give the user a bit of freedom and alterations so I made two more chocolate cases, one with three larger holes and the other with just one even bigger hole. having three different covers meant the user could choose what one they wanted, they could have one with six smaller holes that would take longer for the chocolate to fall though but would spread the chocolate out further when it falls while the one big hole would melt faster but would only fall in one spot.
I also had to think about the shape of the chocolate inside the case, I found it didn't melt all the way though when it was to thick this then meant the chocolate didn't fall though. I also didn't want it to thin then there would be enough chocolate to enjoy. the way I found to get it just right was to have it thiner where the chocolate would exit so it would melt faster and then have it thicker on the sides so due to gravity then it melted it would get heavy and fall through.
Chocolate
when talking it over with my tutor we decided that my wax light wasn't strong enough as there wasn't much to it so after a long time of thinking we came up the the brilliant idea of making the light no longer out of wax but out of chocolate instead, to make it a center piece for a dinner table so the when the light is on it results in the chocolate to melt.
 I thought of different ways I could deign it

- the first was to make the chocolate around the light, on top of it so when the heat would rise from the light it would make the chocolate melt and collapse around the lamp, reveling the light and making a fondu around it. the problem I had with the form would be that I didn't think it would be the best move to have the chocolate fall onto the light as there could be some health risk with halogen lights mixing with food i also didn't want chocolate to get into the wiring as it seemed like a mess to clean up.
- another Idea I had was to have the chocolate like a candle and have the light on the flexible wire and have it going up the center of the light resulting in the chocolate to represent a candle and when the chcoclate melts it would make a melted puddle around the base of the candle.
- another Idea I had was the have a ring of halogen light that the chocolate would melt through, this way the light wouldn't be covered and would be shining the whole time and won't be effected by the chocolate but would still make the chocolate melt through the center.
- the last Idea I had was to have the chocolate and lighting fixture hanging up above the users dinner table with the chocolate below the light incasing the light, and below on the table would be a bowl of the food that the user wants to have covered in chocolate, such as fruit nuts or crackers. when the light heats up the chocolate it will make it drip down and slowly revel the light with in it.
Development.


Saturday, 14 September 2013
Halogen
I felt the next step to do was to buy some halogen lights and play around with them and find out their limitations, I went to a Lighting shop and asked them about halogen lights and want was the easiest to work with so they found me some 10watt bulbs, having 10 watts went that I could set them up to s simple circuit and use normal batteries rater then buying but battery packs.
 i was also given sockets to put the bulbs into so that so it didn't have to play around trying to solder the lights to wire and it also had hooks on it so I could easily attach it to my frame. I also found away to get around soldering because in the last project I found it very difficult to solder so this time to save time and my sanity I would a way to screw the wires in to place rather then solder them.
 I found a place in wellington to buy big blocks of wax that I could melt down and remold in to my chosen shape.


I then made a simple circuit to see it I could get the light to work, and I DID.


The next part was the most important part of my testing, to see if the light could get hot enough to melt the wax, so I set it up so the wax was siting on top of the light so that when the heat off the light would rise up and corse the wax to heat up and melt. and it worked... very slowly, but it worked. i feel a few there where a few factors on why it melted slowly one would have been the fact that it was only a 10watt light and if i had a stronger one it would melt faster and another factor would of been because it was in an open space so the heat was not controlled so it went out the sides so it i made it a closed space it would trap the heat resulting it to melt faster.


Sunday, 11 August 2013
modifying the deign
I changed the design of the lighting device taking out the neck and stand and just focusing on the just the head. I felt that it was going to be to hard to pull of the lamp well with the neck and stand as they had a high chance of not looking ascetically pleasing and looking out of place. I also felt it lost focus from the head, it would be hard for the user to figure out how to use it properly if there was to many parts to it. I then looked at different way to have the whole light all inclosed with in the one lathed wood;
 I want a design that is simple, easy to hold, can hold the weight of the lighting fixtures and looks ascetically pleasing. some my designs I wanted to resumable an old fashioned kaleidoscope and other designs I wanted it to look modern and organic.

 This is the design I finalised on I felt it was simple and organic with its soft rounded edges it was would be quite easy to grasp if needed to. on the top you can rotate it so that you can move around the glass inside. the LED strip lighting will rap round the inside of the top of the lamp and the battery will be in the thiner part and the switch will be at the bottom.
I felt to make the top part the rotates and also the bottom part to cover the hole and to make the switch the easiest way to make them will be to laser cut the pieces so the will be all the exact size and can guarantee that the top will spin.
I then made the out side of the lamp on the lathe focusing on the shape I had decided, I found it hard to round the edges and found my self cutting in at a strait angle not rounded but after a bit of practice I got the hang of it and managed to make it in the end and was quite proud of the out come of it as I was smooth and really easy to hold.


I felt to make the top part the rotates and also the bottom part to cover the hole and to make the switch the easiest way to make them will be to laser cut the pieces so the will be all the exact size and can guarantee that the top will spin.
 |
| The illustrator file of my laser cutting |
 |
| some of my laser cut pieces after they were sanded |

 |
| finished before cutting it off. |
 |
| All polished up. |
Thursday, 8 August 2013
First final design of lamp

this is my first Idea of how to make my lamp it was going to have a wooden lampshade that was going to be lathed with two frosted screens to hold the coloured glass sheets inside, reuse the bendable neck from the desk lamp and have a wooden base support the lamp with the battery hidden underneath.
I want to use wood for the lampshade as I feel it gives an organic feel to it and it is easy to use and construct into unique but symmetrical shapes on the lathe. I want the whole lamp shade to be able to rotate on the neck this will then make the coloured glass inside the light will move and result in making different patterns with the light. To stop all the glass from falling to the bottom of its selected area due to gravity I will split it into three even section so the glass can only fall so far, I feel that if i didn't have the sections the glass would not distort all of the light but only the bottom half of the light being emitted. I will strip down the neck from the original lamp to show the metal as I think it will look better agents the wood and give a good contrast between the wooden lamp shade and wooden base. I will make the base out of the same wood as the lamp shade so there is a connection between the two of them it will also be strong enough to support the rest of the lamp. it also is easy to cut into so I can hide the wires and batters to run the lamp.
.jpeg)
I looked at different shapes I could make on the lathe to construct the lamp shade. I wanted something simple but playful as I feel that this is quite a playful lighting device, I want something that isn't to overpowering from the main purpose of the light, to turn the lamp to make the light change and I also wanted one that was easy to handle as you will be turning the whole lamp to make the glass move and fall.

This is the shape I decided on, it is simple and easy to turn it will have a 20mm hole at the bottom to the neck and fit in to it and still have room to spin. I will make it out of European Beech as I is a strong would so good to lathe with it also has a interesting grain and a soft warm colour.
Saturday, 27 July 2013
kaleidoscope


I came up with two ideas to portray the technique of the kaleidoscope, one was similar to the water lights with in balancing on a rounded bottom and when rocking it the beads/glass move and then would change the lights colour being emitted though. The other is the light on a stand (reusing the bendy one from the lamp I dissembled), in order to make the beads/glass move from inside the lamp is to bend the head of the lamp around, when moving the lamp the bead will change places resulting in the colour of the light changing and changing the pattern.I felt that this one one would resemble the 'redesign' part of the project more as it will be using the stand from the lamp.
Light and water

An Idea that i thought could be affective was the idea of getting light to reflect off water I felt that it give off a simple and organic feel. I like that the way light reflects off water is uncontrollable as light is reelecting off the moving waves, it is soft and fluid it gives a soothing relaxing feel. I think if i made a light that embraces these aspects it could be used as a feature light in someones living room or bed room, a light that gives life to a room in a very simplistic way.

I looked online to see what other people had done with the use of light and water and I stumbled upon this product designed by Yuki Yamamoto. It a speaker that turns music into sound an light, when music is played thought the speaker it creates movement that results in the water producing waves across the surface and when light is reflected off the water it creates the detailing shown on the wall. I like this concept in the way that a different source is crating the motion of the water which results in the light being refracted by the moving water. for the light to move it is dependent on the speakers to vibrate the water.

One design I though of was having the water in a bowl shaped object in which you tap the edge of the bowl and it rocks back and forth resulting in the water to move and have the light from above shining down on the moving water.
Another way of portraying it is making the rocking bowl double layered with the light coming from beneath the water and having the top layer transparent to the light can emit though. there is two ways I though to make the water move in this design, either rock it like the first idea or have the top layer detached from the bottom and spin it. The problem I had with the second movement is the fear that water could then get into the lighting circuit and effect the wiring.
Friday, 26 July 2013
Disassembled Lamp,

- Base- used to hold up the lamp and also hide all of the wiring, concrete and screws.
- concrete base- used to help the light stand up and stay balanced if there wasn't concrete in the base then the lamp would fall over as it would be top heavy.
- Bendable neck- Is used to have the light stand up higher, carry the cord/electricity to the light bulb and it is also bendable so you can adjust the angle the light shines at.
- Plug- like any other plug; gets plugged it the wall the the source of were the power comes from.
- switch- stops or completes the electrical circuit that results in tuning the light on and off.
- socket- where the bulb it inserted and hold the bulb in place. it also transfers the current into the light bulb.
- bulb- it where the light comes out of.
- lamp shade- is used to stop light shining off into unwanted parts of the surrounding, narrows and selects where light is directed.
- screws- holds everything together. used on the base and on the lamp shade.
Monday, 29 October 2012
Project 3 DSDN 112
PRECEDENTS


 I felt that I liked the idea of making a stop motion as I felt it would be an effective way to present my movie. I looked into stop motion videos on you tube and vimeo for ideas on how to make it and I really liked the the theme where they make stop motion out of paper, I felt that it would reflect my app well as my app is made out of text. i liked theres videos from vimeo;
http://vimeo.com/2295261,
http://vimeo.com/3715286,
http://vimeo.com/15263537,
http://vimeo.com/5020134,
http://vimeo.com/41519839
all of these videos use paper to create stop motion, some give the vintage feel which I like as if reflects my app, while others use different colours of paper to contrast the different imagery and to make it bold and stand out.
FIRST IDEA
 My first Idea is to make a 3D world made out paper with words on it, such as magazine or news paper pages and have stop motion of a cut out of a person walking through it to reenact my app


I made two of the walls to trial it but I felt to execute this well it would require a lot of time so i felt i should simplify my idea.
IDEA TWO
my second idea was to make people out of paper such as news paper or magazine paper as it would reflect my app. I felt that they would be easier to stop motion then making the 3d world in my first idea. I first made silhouettes of people but i felt if i made them they would take time as each movement i would have to cut out a new person.


FLASH
I had great trouble with Adobe flash this time around, It spent most of the time freezing or quitting which resulted in me spending hours trying to export the movie parts of my app in to quick time so i could try make my movie in iMovie which worked with less tantrums
ADD ON'S
I added a new part to my film that I didn't put in my story board. I felt that i should explain to the user what each main button did so I had the sham hands used in my app to point on each option and tell the user and audience what each button did.


MUSIC
I spent ages trying to find the best sound to fit my film, I wanted a tune that was happy and quirky as i felt it would give a positive spin on the film. I decided on a tune that i found on http://freemusicarchive.org a song by Oskar Schuster called Sneeuwland
MY FILM
My film is found on my Vimeo Account https://vimeo.com/52429863


http://vimeo.com/2295261,
http://vimeo.com/3715286,
http://vimeo.com/15263537,
http://vimeo.com/5020134,
http://vimeo.com/41519839
all of these videos use paper to create stop motion, some give the vintage feel which I like as if reflects my app, while others use different colours of paper to contrast the different imagery and to make it bold and stand out.
FIRST IDEA


IDEA TWO
my second idea was to make people out of paper such as news paper or magazine paper as it would reflect my app. I felt that they would be easier to stop motion then making the 3d world in my first idea. I first made silhouettes of people but i felt if i made them they would take time as each movement i would have to cut out a new person.

so i tried to make a cut out of a person which moved so i made different parts that moved such as arms and legs and then put pins in them so they could move. after making one in white i felt i should make one that contrasted with it as i could use an off white background like my app and then the person wouldn't stand out. So I made one in red. I haven't figured out how I could incorporate them.

i made a small stop motion to show how i could make them walk.
STORYBOARD

this is my story board i felt i would make it simple. in the movie i want ti to walk through what the app can do. with a person being lost and writing on the wall saying they are lost, I felt that she should write on the wall as I felt it reflected my app as it incorporated the idea of using words as a main idea. they would then place the phone on the ground and the app would fold out of the phone the would then play till the main screen then go back to them saying they cant find there friend then would show how they found how they are on campus and then from there would stop motion of them walking with the walls will have a overlay of text just like the app but putting in on the actual walls on kelburn.
WALLS
in my movie i want there to be iteration with the user and the app such as opening the app and showing how they use it. but also have things that happen 'in the real world' to relate back to the app. the two ideas i have come up with is having the user wright on the walls saying that they are lost, so the audience knows that they are need something to help them direct them on where to go.

Also in my app when it goes into 3D view it has the walls made up of text and this text tells them where to go and where they are located. I want to incorporate this idea into my app by having stop motion of the user walking though kelbun and have text overlaying the walls

I am a small stop motion to see how it looked, I found that this was very time consuming as on each frame i had to move the text and then line it up to where it was stilling in the previous frame. I also found that there was to much going on when I had them up and you lost focus on the person walking.
I had great trouble with Adobe flash this time around, It spent most of the time freezing or quitting which resulted in me spending hours trying to export the movie parts of my app in to quick time so i could try make my movie in iMovie which worked with less tantrums
ADD ON'S
I added a new part to my film that I didn't put in my story board. I felt that i should explain to the user what each main button did so I had the sham hands used in my app to point on each option and tell the user and audience what each button did.


MUSIC
I spent ages trying to find the best sound to fit my film, I wanted a tune that was happy and quirky as i felt it would give a positive spin on the film. I decided on a tune that i found on http://freemusicarchive.org a song by Oskar Schuster called Sneeuwland
MY FILM
My film is found on my Vimeo Account https://vimeo.com/52429863
Subscribe to:
Posts (Atom)